Learn to paint with acrylics from scratch. Acrylic - getting started and some subtleties
Acrylic paints are one of the most popular materials for artists. Advantage These paints before some others are that acrylic dries very quickly. If artists sometimes have to wait an hour or even several hours when painting or using oil, to dry one layer to apply the next, then with acrylic these problems simply disappear, since this material dries in a matter of minutes. However, certain complications can be caused with this, since instantly drying paints do not allow simple and quick changes. Another advantage of acrylic is that, unlike oil paints, acrylic does not crack. It can be applied in a thin or thick layer, acrylic can be applied very thick or in a diluted state with water. Acrylic is suitable for application on surfaces such as canvas, canvas, glass, wood, metal and other surfaces.
In addition to the foregoing, artists prefer acrylic paints to oil and watercolor because they have their own, completely unique color rendition, which is sometimes very difficult to display with other materials. Due to its amazing features, acrylic can be used in one picture in its various states, for example, in liquid form for applying the background and in thick form to create three-dimensional images. Thus, it is possible to achieve an unusual texture of the work.
In many ways, acrylic is very similar to oil paints. The difference and advantages of it is that with this material no solvents are needed. In addition, tools, hands and soiled acrylic clothing are easily washed. Another advantage is that acrylic paints are odorless and are simply a salvation for allergy sufferers, since they rarely cause a negative reaction of the body.
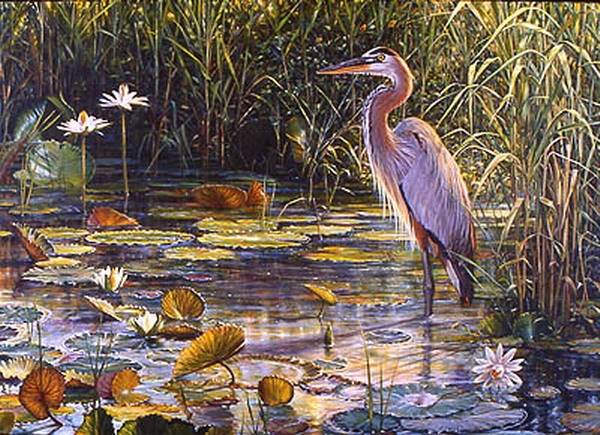
Artists at all times loved to depict flowers. We will try to write this beautiful geranium in a pot acrylic paints.
For a novice artist, this still life may seem very complicated, in fact, the flowers and leaves are painted with light strokes.
Earthy tones - raw and burnt sienna - are best suited for writing ceramics, including clay pots. Geranium leaves can be conveyed in various shades of green, using either pure green paint or mixed in various proportions with yellow paint or white. The green color in this picture should be very intense to enhance the contrast of green with red petals of geranium. Red and green, as you already know, are complementary colors, their combination will help create the focal point of our picture.
The advantages of acrylic paints
Acrylic paints are ideal for floral still lifes. They, as we have already said, dry quickly, so it is easy to apply them in thick layers on the canvas. In today's lesson, you will learn how to use different strokes to emphasize the texture of a particular surface.
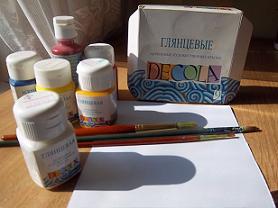
For a drawing lesson you will need
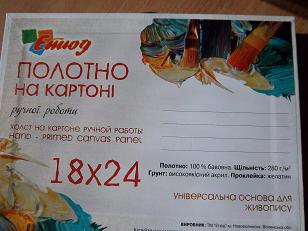
Stretched on the tablet
40 × 30 cm in size not very rough canvas
2B pencil
Brushes: flat No. 12, flat with a rounded tip No. 4, round No. 8
11 acrylics: red cadmium, yellow cadmium, dark green, light olive, cobalt blue, ultramarine, burnt siena, raw siena, burnt umber, yellow ocher, titanium white
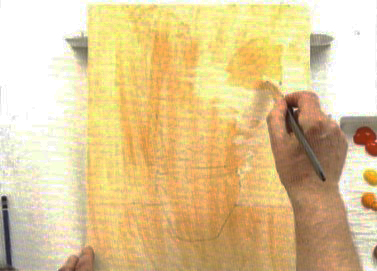
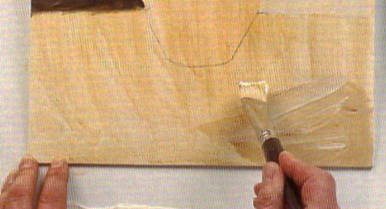
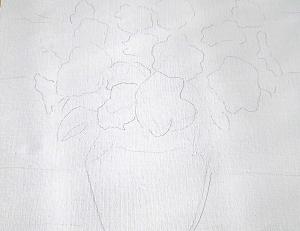
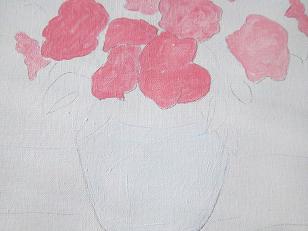
1 Prepare the canvas for work and sketch
Draw a little raw Siena onto a flat brush, dip the tip of the brush in water to dilute the paint, and cover the stretched canvas with a layer of pale brown primer. When the primer is dry, use a pencil to sketch the future still life. Flowers should be outlined simplified, in the form of a stalk with a circle on the end.
Color selection
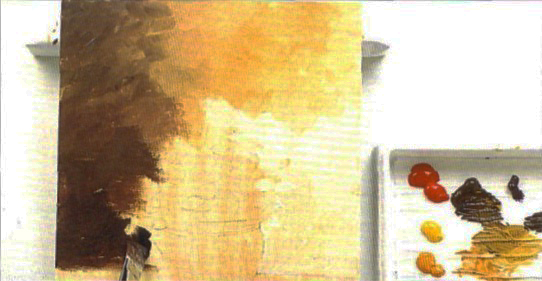
Before you make a smear on the canvas, you should first apply to the palette all the paints that you intend to use during work. Thanks to this, you can imagine how the colors next to each other will be combined in the picture. Try to place the paint squeezed out drop by drop in a certain order: for example, the horizontal row is warm colors, the vertical row is cold. But remember, acrylic paints dry quickly. Therefore, use a special palette whose surface is covered with a layer of blotting paper. When you are finished, you simply remove the blotting paper from the palette and discard it, and next time cover the palette with new blotting paper.
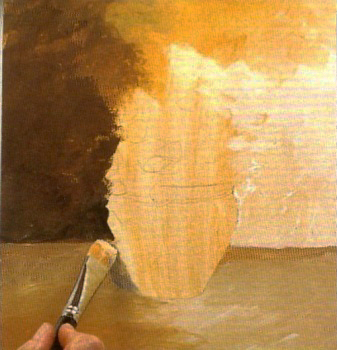
2 Brighten the background
Add a little white to the raw sienna and cover this part of the wall with the brightest paint that is most brightly lit to the right of the geranium pot. Rinse the brush and apply a spot of yellow ocher on the fragment of the picture where the flowers will be located. Apply paint in smooth strokes.
3 Writing a Shaded Wall Section
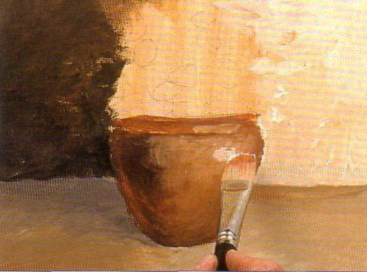
Without washing the brush, dip it into the burnt umber. Write a shadow in the upper left corner of the picture with this mixture. Now dip the tip of the brush into ultramarine. Write in this dark tone the left side of the pot.
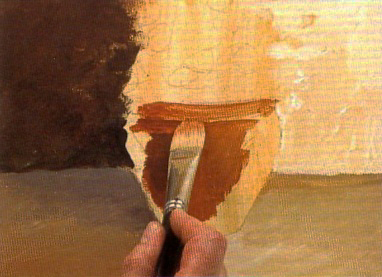
4 Make highlight
Rinse off the brush. Mix raw siena with titanium white. Mark this mixture with a light spot - a light flare - on the clay pot.
5 Writing background
Mix more raw sienna, titanium white on the palette and add a drop of blue cobalt and red cadmium. Write in this brownish-gray tone the lower part of the background (table surface) to the left of the pot, gradually mixing whitewash as you move to the lower edge of the canvas. Draw with the same paint the line separating the table from the wall. Mix ultramarine with red cadmium and write a shadow falling from the pot.
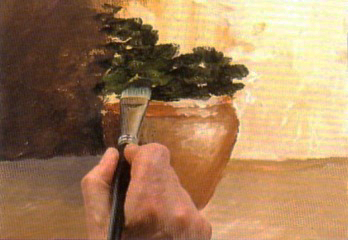
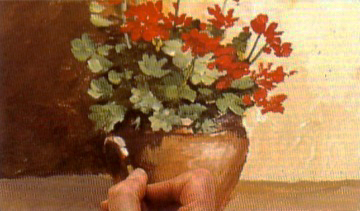
6 Go to the clay pot
Rinse off the brush. Mix burnt sienna with a little yellow ocher and a drop of titanium white. Write the center and top rim of the clay pot.
7 We continue to write a pot
Dip the brush in burnt sienna and burnt umber. Write with this mixture the left side of the pot and the subtle shadows that run along the rim and bottom of the pot. Make a smooth transition of colors. Dip the brush in white and lighten the right side of the pot.
At the next stage of work, we will write the leaves. We use intense green color, which will become the background for the rest of the shades. Make sure that the leaves in the shade are not too dark.
Self expression
In the still life depicted, the same pot of geranium is written much softer, although the color of the picture is saturated. The artist applied acrylic paints to a stretched canvas with a regular sponge, which can be bought at any hardware store. If you want to repeat after him. pick up a sponge and tear it into pieces - with them you will paint on the canvas. You can use a sharp sponge tap to write flower stalks.
If you mix acrylic paints on a special palette that is covered with a layer of blotting paper, remember that sooner or later they will still dry.
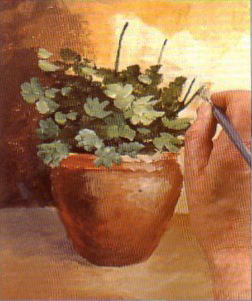
8 Writing leaves
Mix dark green paint with a drop of ultramarine and a drop of burnt umber. Make strokes with this mixture over and around the pot. Without washing the brush, dip its tip in yellow paint to get a lighter green tone. Carefully cover the spots of dark green paint with wide strokes of light green tones. Let the paints dry.
9 We emphasize the details

Now take brush number 4. Dip it in dark green paint, and then in titanium white and yellow cadmium. Apply specks of the resulting mixture to the central part of individual leaves. Write some new leaves. Dip the brush again in titanium white and make smears on the newly added leaves.
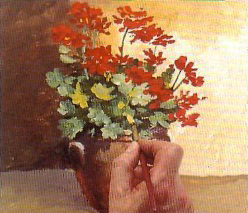
10 Writing Flower Stems
Rinse brush number 4. Directly draw from the tube a dark green paint and with the tip of the brush draw thin lines - stalks of geranium.
11 Finish writing the pot
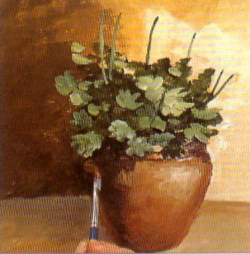
Add a couple more green leaves around the pot. Rinse off the brush. Now with a mixture of red cadmium, burnt siena and ultramarine, deepen the shadow to his left. Rinse the brush again. Mix burnt sienna with titanium white and write the curved handle of a flower pot.
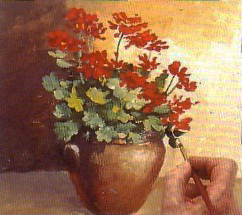
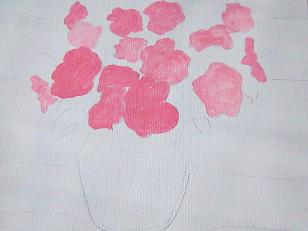
12 Write flowers
![]()
Rinse brush number 4, Mix red cadmium with burnt umber, Transfer each petal with a separate light smear. Rinse off the brush. Mix red cadmium with a drop of yellow cadmium. Write brightly lit petals with this mixture. Just don't get carried away. It will be enough to make a few strokes.
How to keep brushes in good condition
When you wash the brush in a jar of water, you certainly want to wipe the hairs on its edge. But from this your brush will soon become worthless - the hairs will come out. To avoid this, try to take a bigger can and change the water in it as often as possible. When the time comes to rinse the brush, dip it in water, chat well, and then just shake off excess water.
13 Select details
Take the No. 8 round brush. Apply small strokes of red cadmium to the petals. Rinse the brush. Mix titanium white with a drop of burnt siena. Underline the curved handle of the pot with this mixture.
If you wish, you can continue to work on the picture. Try to apply strokes of various thicknesses that will help you highlight the texture of a flower pot, leaves, petals.
14 Marking glare on the leaves
Rinse off the brush. Combine cobalt blue, dark green paint and titanium white, write highlights on the leaves.
15 Making the finishing touches
Rinse the brush, mix titanium white, yellow cadmium and light olive paint. Mark on the greenery small specks of light glare, which will give your picture an impressionistic shade. Write a dark green leaf on the right side of the pot.
Step-by-step lesson in phased acrylic paints - result
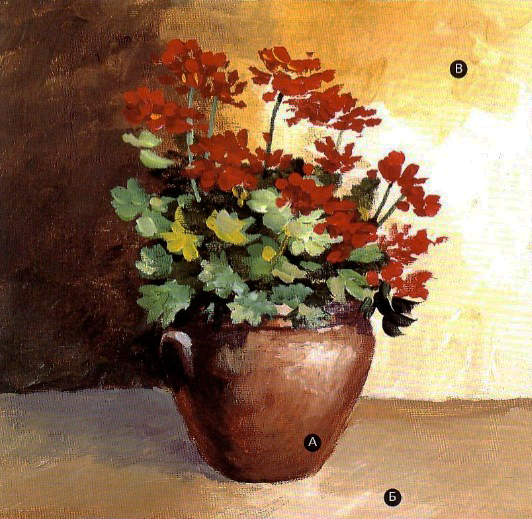
A optimal size
The flower pot is depicted large enough to impress the viewer, but at the same time it does not fill the entire space of the picture.
B Spotted surface
In neutral background
The neutral background emphasizes the vibrant colors with which the flowers and greens are written.
Lesson number 31. We draw flowers with acrylic.
Continue painting lessons for novice artistswhich are published in.
Today we will draw the first picture using acrylic paints. If you have already prepared everything you need, you can begin to learn this very interesting technique.
Immediately I want to draw your attention to the fact that much more white paint may be needed than all other shades. Because it will often have to be added in order to achieve the color you need. There is zinc white and titanium white on sale.
White titanium mixes better and overlays the canvas. A set of colors usually has titanium white, and if you buy a separate jar, just pay attention to what is written on it.
For our picture, you can buy both canvas on cardboard and stretched canvas. Cardboard canvas is cheaper, so it’s easier to start painting on that basis.
For this lesson, I chose simple flowers that grow in a pot near a wall sheathed with boards. Therefore, we will learn not only how to draw the flowers themselves, but also how to work on an interesting background.

As soon as you start painting with acrylic, you will immediately understand how interesting it is for an artist to work with such paints.
If we painted sequentially with watercolors, waited for it to dry, now we can draw quickly and work not with individual sections, but immediately over the whole picture.
In the following lessons we will learn how to use in acrylic technique receiving layer-by-layer glazing, while achieving amazing transparent shades.
A palette knife is also useful to us for applying paint, it is convenient for them to apply thick paint without diluting it with water. If we always diluted the watercolor with water, and then applied a thin layer, then acrylic can be used in the impasto technique.
With this technique, a thick overlay of paints occurs to enhance the light effect and the overall impression of the picture.
Acrylic always gives the artist great pleasure and helps to convey his mood to those people who will then look at the finished picture.
Acrylic paints can be applied to the picture not only with a brush, but also simply with a finger.
Remember to rinse the brushes while you work and do it thoroughly. Otherwise, the acrylic paint will dry out and your favorite brush will be completely damaged.
On your table should definitely be a jar of water, paint and a palette.
After washing the brush, it can be wiped with a dry cloth and put to dry in a vase or jar.
Learn to enjoy working with paints and enjoy creativity.
Of course, any artist has days when for some reason there is no mood, although everything is already ready for drawing. In this case, do not force yourself, just take a break, dream a little, and again the creative mood will return.
The type of person’s character also determines how he looks at the world. If you have long wanted to know yourself better, you can read about the types of temperament of a person on the website www.zuit.ru in the section of personality psychology.
All artists are special people, they look at the world in a slightly different way and always see its amazing sides, which you really want to portray in your picture!
Canvas on cardboard is easiest to put on a table, but you can also install it on a special stand - an easel.
First, we will learn how to draw on a horizontal surface.
So, lay the foundation for drawing in front of you and pick up a simple pencil. Canvas can be painted with charcoal or pencil. Or sketch with a thin brush. But for now, we will stick to the proven method. If you studied with us, studied all the lessons of watercolor, now you will not have any difficulties what I will talk about.
We look at the photo and sketch with a pencil. Flowers do not need to be drawn too carefully, we outline the cracks between the boards and draw a pot in which the flowers grow.
Between the flowers we sketch the leaves. The pencil lines are still useful to us, they will be visible through the paint until some point, and then disappear.
We collect red or pink light paint from the jar and transfer it to the palette. Instead of a palette, it’s good to use a plain white sheet of paper or a tear-off paper palette.
Add titanium white and mix. After that, you need to dilute this mixture a little with water, and only then we will start to draw on the prepared canvas.
One simple tip: you need to draw the paint from the jar with the very tip of the brush, otherwise there will be too much paint, and it simply will not be used up. On the palette, excess paint will quickly dry out and will have to be thrown out.
Add a drop of blue to the whitewash and draw a pot, thus painting the canvas. Pay attention to how the paint goes.
The thicker your mixture, the more textured the surface will be, and the brush strokes will become embossed rather than flat, as was the case with watercolor.
We draw leaves, mixing for this a light shade of green paint and yellow paint. Between the colors we just put small spots until the form matters, because we apply only the first coat of paint. We leave white spaces between the leaves as is, without painting over.
After it dries, we will begin to work more carefully on each flower or leaf.
In the next step, we need to apply a layer of paint on the background. Since the flowers hang on the wall, which is sheathed with boards, we will prepare a mixture of several colors to get the desired color.
On the palette, mix the yellow paint, add red to it and mix well. After that, draw a little brown paint on the brush and add it to this mixture too. After that, we will dilute the mixture with water and see what happened.
If you scored more paint on the brush than you need, just swipe the brush over the palette in another place, then excess paint will not hurt you. It will remain on the palette, it can be used for another mixture.